Connect and approve
In WordPress
- Open Wigoh in the admin menu.
- Review the environment verdict. If the site is not detected as staging, read the warning.
- Press Connect to Wigoh. The plugin registers the site's public key with Wigoh and proves control of the site by answering a one-time challenge.
- Your browser is sent to Wigoh's approval page. A six-character confirmation code is shown in WordPress.
In Wigoh
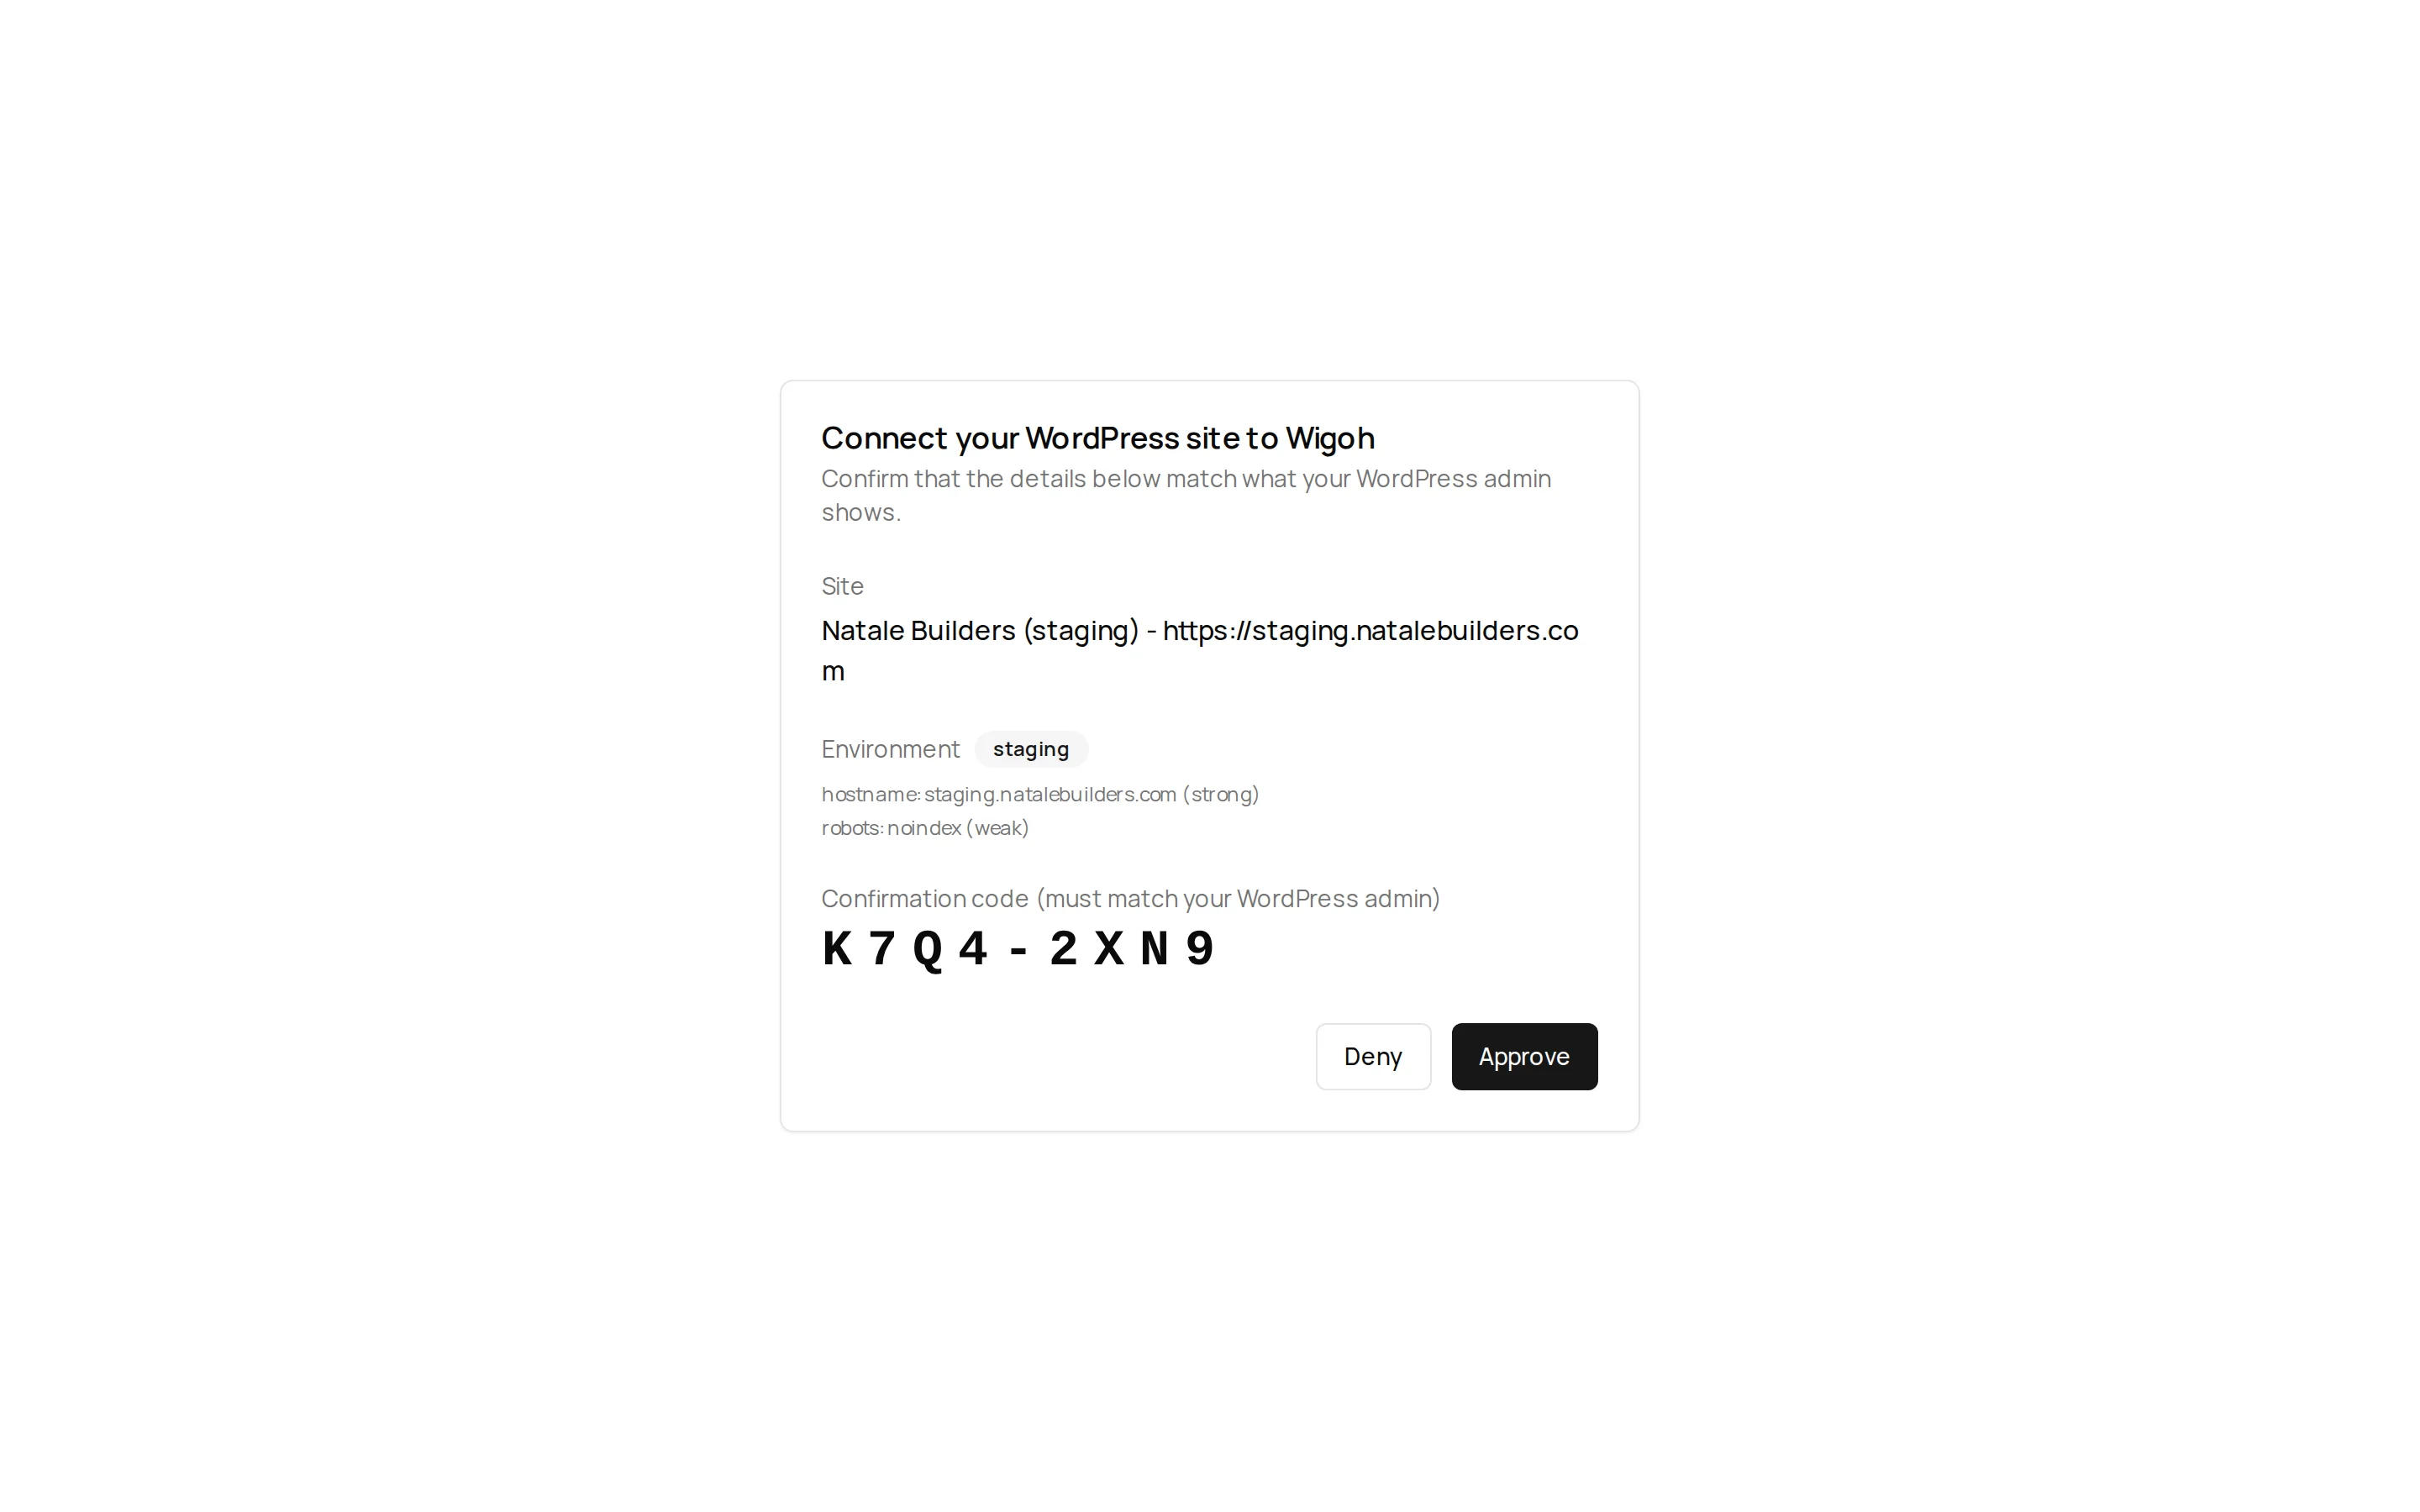
The approval page is titled Connect your WordPress site to Wigoh — Confirm that the details below match what your WordPress admin shows.
- If you are signed out you see Sign in to Wigoh to approve this connection with a Sign in to Wigoh button; you come straight back afterwards.
- The page shows the Site (name and address), the Environment verdict with its evidence, and the Confirmation code (must match your WordPress admin) in large type.
- For a non-staging site, tick I understand this is a live site and I accept the risk.
- Press Approve. Or Deny to cancel; you return to WordPress with the connection declined.
Back in WordPress
The Wigoh page now shows the linked account's email and the link date. The site appears on Connected WordPress in Wigoh with the status Active.
If the codes do not match
Press Deny and start again from WordPress. Never approve a code that does not match.
Messages
- Missing connection parameters. Start the connection again from the Wigoh Connect screen in your WordPress admin. — the approval link was opened without its parameters.
- Unable to load this connection — the site could not be looked up; start again from WordPress.